 Skip to content
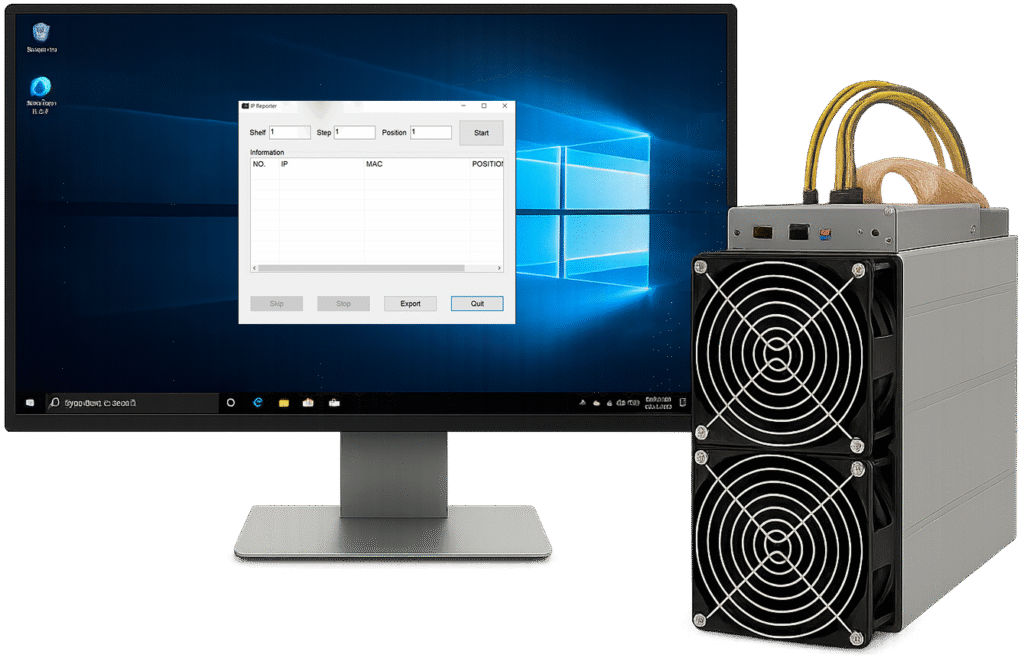
What is IP Reporter for?
IP Reporter is a program that helps you easily find and identify the IP address of your ASIC miner, such as an Antminer. With IP Reporter, you can determine your miner’s IP address, easily configure the network for mining farms, and troubleshoot any network issues that may arise.
Below, we will provide a detailed guide on how to install and set up your IP Reporter.
Installing IP Reporter
Installing IP Reporter is very easy. Here’s what you need to do:
- Download IP Reporter: You can download the latest version of the program from the link above on our website.
- Extract ZIP: Extract IP Reporter to a location of your choice.
- Run: Double-click the IP Reporter icon, and the installation will be completed. You will see the program window, as shown in the screenshot on the right.
 IP Reporter
Instructions for Using IP Reporter
After launching IP Reporter, follow these steps:
- In the IP Reporter window, click the “Start” button.
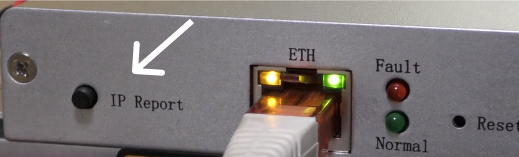
- Press the “IP Report” button on your ASIC miner.
- A window will appear displaying the IP address and MAC address of your miner.
- Click “OK” if you want to close this window.
- Click “Skip” if you want to continue searching for the miner. You will need to press the “IP Report” button on your ASIC miner again.
- Click “Stop” if you want to pause the program.
IP Reporter 
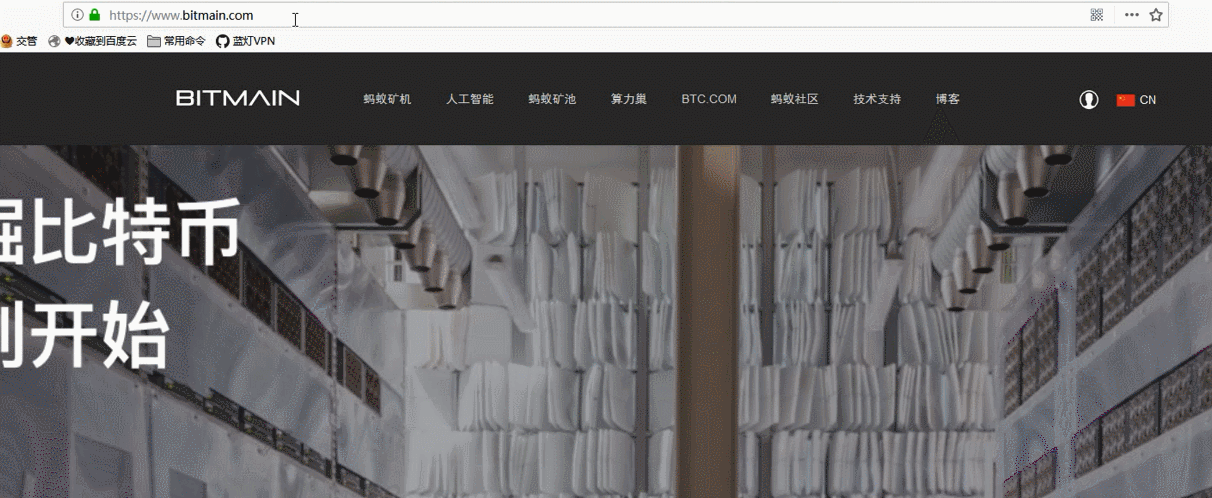
Once you have completed all the steps above and found the IP address and MAC address of your miner, you can access the Antminer control panel using the IP address you obtained. To do this, enter the IP address into your browser’s address bar, as shown in the example below.
The default login and password are both root.You can also watch the video tutorial if you encounter any issues.
How to Find Your Miner’s IP Address
Now let’s explore other methods for finding the IP address of your Antminer, Whatsminer, etc.
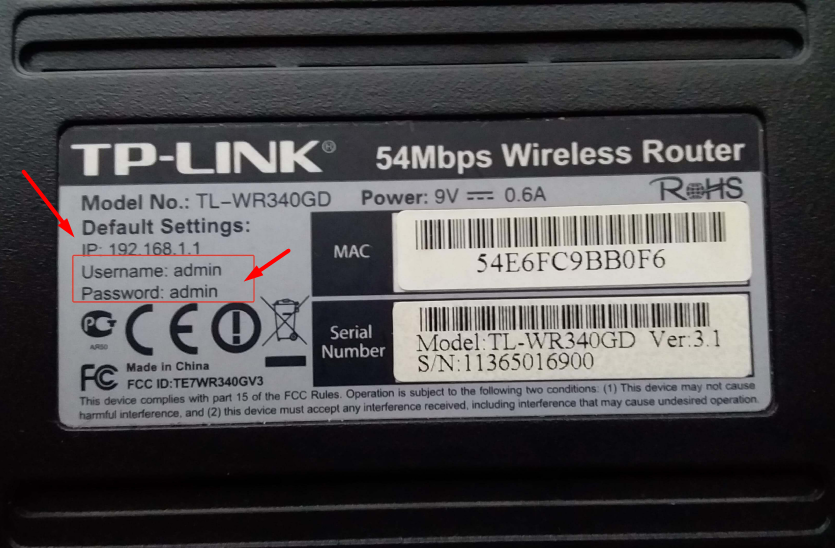
One method to find your IP address is through your Wi-Fi router:
- Locate the sticker on the back of your router with the details (IP address, login, and password).
- Enter the router’s IP address into your browser’s address bar and press Enter to access the web interface.
- In the list of devices, find your ASIC (Antminer or Whatsminer).
- Copy the IP address of the ASIC and enter it into your browser’s address bar. Press Enter and log in with your credentials.
For Antminer:
Login: root
Password: root
For Whatsminer:
Login: admin
Password: admin
Loading into the ASIC web interface. Everything is ready.
The second method is using an additional application. If you have an AntMiner, you will need the BTC Tools app. This app helps find the IP addresses of ASIC miners on the local network.
For more detailed information on how to find the IP address using BTC Tools, you can visit the official BTC Tools website.
IP Scanner
You can also use an IP Scanner to scan for IP addresses (though it may not be suitable for all miners). If you do not know the router’s IP address, you can install an IP Scanner to find the IP address of the miner.
Ensure your computer and miner are on the same local network (via router).
Press Windows + R, type
cmd, and press Enter. In the Command Prompt window, enter the command:ipconfig /allFind the line labeled “IPv4 Address” — this is your computer’s IP address. For example, if it looks like
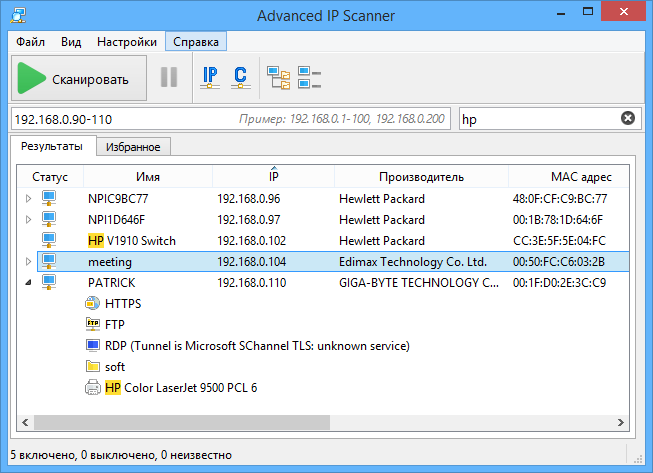
10.0.5.23, your network uses the range10.0.5.x.Open the IP Scanner. Enter the range of IP addresses that covers all devices on the network, such as
10.0.5.1-10.0.5.255, and click “Scan”. The program will start searching for all devices on this network.When the scan is complete, the list will show all devices with their names, IP addresses, manufacturers, and MAC addresses. If the miner is listed by name, you can easily find it. Otherwise, look for the IP or MAC address of the device. For example, the miner’s IP might be
10.0.5.78.Now that you have the IP address of your miner, enter it into your browser’s address bar to access the web interface for device configuration.
You can use the IP Reporter tool to determine the device’s IP address. This tool is well-suited for both individual miners and large mining farms. Typically, Antminer devices have a dedicated button for this function.
IP Reporter - Frequently Asked Questions
How to Access the Miner’s Control Panel?
- Enter the miner’s IP address into your browser.
- Enter the login and password:
- Antminer:
root/root - Whatsminer:
admin/admin
- Antminer:
What to do if IP Reporter does not find the miner?
- Check your network and connection to the router.
What to do if the miner’s IP address does not appear in IP Reporter?
- Try resetting the network settings of your miner and try again. Make sure your device is connected to the same network as the ASIC miner.
How to find the IP address using BTC Tools?
- Install BTC Tools (for AntMiner).
- Run the program, and it will automatically scan the network, finding all connected ASIC miners.
- For more detailed information, visit the official BTC Tools website.
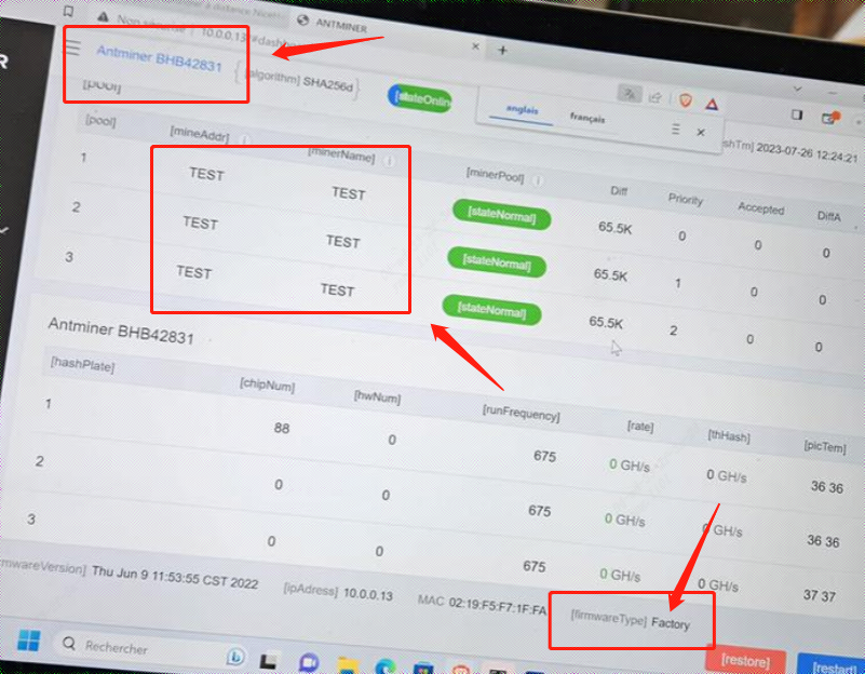
Troubleshooting Antminer
When working with miners, you might encounter a situation where the device is in a “TESTING” state. This means that the miner’s settings are locked, and you cannot change them. This issue is commonly seen with factory firmware and requires specific actions to resolve.
Why is the miner locked in “TESTING” mode?
This mode is used for internal testing of the equipment on production lines. After completing the tests, the device is usually switched to normal operating mode. However, in some cases, the firmware might remain in the “TESTING” state, restricting access to settings and affecting normal operation.
How to Resolve the Issue
Reflash the Device
One of the most effective solutions is to install a new firmware version. This will remove the lock and restore access to the settings.Restore Factory Settings
Try resetting the miner to factory settings. Most devices have a reset button that needs to be held for a few seconds. This method may return the miner to normal operating mode.Contact Technical Support
If the miner is still in the “TESTING” state after resetting and reflashing, contact the manufacturer’s technical support. They may need to intervene to resolve the issue.Use Third-Party Firmware
In some cases, you might consider installing third-party firmware that does not have a testing mode. However, this could affect the warranty and support for the device, so proceed with caution.